Showing posts with label art. Show all posts

Sunday, April 10, 2011

Ian Art with Photoshop

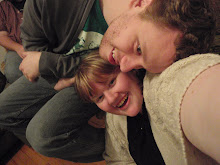
Tonight, I tried my hand at making some Word Art using a photo I had of my boyfriend, Ian, and a tutorial I found at the psdtop blog.  It was certainly interesting to try. I have seen a few How-Tos across the web, though I haven't really seen any for non-Adobe programs. To do it, I looked through my files to find a picture of a front-on face that had a good mix of light and dark. I chose this one of Ian because I knew it would annoy him!

I think when I do it again (and I will, with a better picture and more definite concept), I will follow the directions exactly as laid out rather than fiddling with the tutorial before executing it the correct way first. I always seem to do that-- try to "make it better" before I have actually done it the other way first. I had used 3 different shades of gray rather than just making the word usage smaller and less dense as the tutorial instructs. It wasn't until I was finished with my image that I could see the value of what they were trying to do with those directions.

Monday, February 14, 2011

Love the Art Work, Hun!

 
I just wanted to give you a little peek of how the canvas I made for my sweetie looks on our bedroom wall. He came home and noticed it right away, bless his heart. I am an awkward present-giver so I went ahead and had it on the wall before he even came home. No unwrapping-- easy peasy. AND it gave me an excuse to hang up the mini canvases we made as presents for each other a few years ago. The idea was we made a canvas about ourselves and a canvas about each other.

Sunday, February 13, 2011

Valentine's Day Canvas Tutorial

A couple of notes for advice:
1. Use card stock if you are going to make your own stencils. That will help you avoid bleeding. Also, try to match the card stock near/close to the color you are painting with. The edges of my letters dried into the paint. I used sharp-edged tweezers to remove these little paper pieces but had I used white paper, this would not have been a noticeable issue.
2. I stippled my painting to avoid obsessing over perfect paint coverage. I made a nice mix of red, white, and pink which works well for the look I was going for.
3. I used my Gypsy to meld together the letters in the words that I made larger for emphasis. That made it alot easier to lay out the letters and make it work.

Monday, January 3, 2011

Tutorial: Button Monogram Art


I apologize it has taken quite so long to get this tutorial posted! As I know I have mentioned a time or two—it has been a busy couple on months.
Anyway, here goes!
 

Tutorial: Button Monogram Art 
 
Materials:
Canvas or frame
Piece of scrap fabric
50-200 buttons of the same color (give or take, considering your project size and the size of your buttons)
Needle and Thread to match the button color
Staple gun with staples
Initial template (hand drawn or printed from a computer)
Embrodery hoop
Straight pins


1.       1. First figure out what size frame or canvas you are trying to cover. Add an inch all around to allow for overlap and attaching at the end.

2.       2. Once you have your size figured out, sketch up the initial you want to recreate. You can freehand a template or print out a font on the computer.

3.       3. To actually start working, take your piece of fabric and stretch it out over an embroidery hoop.

4.       4. Pin your monogram onto the center of your stretched fabric.

5.       5. Now, bust out your button collection! There was two ways to go about laying out your buttons to the monogram. Way one: take out your button collection and lay out all of your buttons over a second paper copy of the initial template to see where and how to affix your embellishments. I did this with my first uppercase letter.  It worked out well—I took a digital photo of the layout before moving any buttons so as to preserve my hard work. Way two: wing it! That is the approach that I took for the lowercase letter.

6.       6. Starting with larger sized buttons, take a needle and thread and attach buttons thru the initial template. Don’t worry; you can cut the paper away later. 

7.       7. Once you have your main, base buttons attached, cut away the paper. If you wait to do this later on after the small buttons are sewn are, it is much harder to remove the paper cleanly. (You can wait, though if you want. I did for the first monogram!)

8.       8. If you did decide to keep the paper on thru to the small size buttons, take small scissors and start clipping away the paper that you are able to reach. To make it easier, remove the fabric from the hoop. Please be CAREFUL not to cut any threads you have in and around the paper.  

9.       9. Remove your fabric from the hoop (if you haven’t already). Lay the piece face down on a counter. If you used buttons with back loop shanks, you may want to lay the piece down on a slightly padded surface. Lay your canvas or frame over top your fabric, centered. Take your fabric at the top and fold it over the back of the frame. Place one staple in the top center. Fold the bottom of the fabric over the back. Pull taught and place a staple in the bottom center of the fabric. Repeat steps for the left and right side of the canvas.  Starting at the top again, pull your fabric taught along the edge, placing a few staples along the way. 

10.   10. If there is any extra bulk fabric on the back, trim around the staples so the back of the artwork can lay flat against the wall.

11.   11. Hang up—and done!

Monday, September 20, 2010

R is for Results

I have been seeing these button canvas art pieces all over the internet recently and I wanted to try and make on for my black and white wall. I purchased a canvas art piece at a local discount store with the intentions of reusing the framework, not the art it came with. Yikes! To be honest, I am not sure who the previous piece appealed to-- it was internet catch phrases (such as ttfn, lol, j/k) in 2 inch letters repeated across as 10 x10 canvas.

Anyway, to make my "R" monogrammed Button Art, I first surfed thru my vast font collection. I made the mistake of asking my boyfriend for his opinion, and was directed to a very very plain font face:Lucida Bright. Please do not get me wrong. I do love this font but it is really much more plain than I had been aiming for. Ian is not one for flourishes so this isn't really a surprising turn of events.

After picking my font, sizing it to fit properly on the canvas (in this case 8.5 inches tall), and printing it, I started into sorting my buttons. Oh! I do love buttons. I sorted my whites into 5 general size categories. From there, I put my fabric in an embroidery hoop, pinned the R printout on to the fabric directly, and started sewing buttons on directly thru the paper and fabric. I started where the R legs and belly meet on the underside for no other reason than I thought it would be good to start as center as possible.

Once the buttons are secure, cut/tear away the paper. Stretch and staple the fabric onto the canvas framework and enjoy your beautiful buttons on display.

I plan on making a smaller, lower case R in reverse colors this week. I'll be sure to take step by step pictures to flesh out this tutorial and add it to the tutorial pages on the right hand side there.

Tuesday, September 14, 2010

Entry Hall Art, Part 2

Progress!

Today I hung up a few elements that I had already prepared for the entry way. There should be a long shelf above the back rose cut out (Home Goods. You have to love Home Goods), but the weight of the shelf was too much for the nails I was using. I guess I need to install it with some screws? I have never hung shelves before so I am just not sure. I will Google it later! Google rarely fails me.

I am on the fence about the fabric circle I have going on in the lower middle section. I am going to wait until everything is hung before I make a final decision on it, of course, but as it stands now the circle just looks out of place. I do have a small canvas that could go there if I decide to change my mind.

I do love options.

Monday, September 13, 2010

Entry Hall Art, Part 1

We bought our house 2 years ago this past May. I love the house-- it was in great condition, good price and location, plus it is big enough that we have room to spare, even if we were to have an addition to the family.

One thing that has driven me crazy from the first month we moved in is our total and complete lack of art on the walls. It seriously makes me feel like I am living is a college dorm and not as a home owner.

After some creative negotiating, my boyfriend has agreed to give over to me a wall in the house. The deal was that I would keep it all black and white strictly. This is a pretty huge step for him considering he is a bit of a opinionated control freak that has a hard time identifying what he likes in a concise manner.

Exhibit A—pictured here, you see the mapped out wall of my future DIY fun. More projects to follow!