Tuesday, March 22, 2011

Homemade Peppermint Patties

YUM!

I found this recipe for Homemade Peppermint Patties and I have to say-- they are amazing! They melt in your mouth, which is delightful. I made them with milk chocolate, not the traditional dark chocolate... mainly because I didn't have any dark in the house and was too lazy to go out and get the right stuff.

I brought them into work for our St. Patty's day celebration and got rave reviews. Since I didn't have the recipe with me for my co-workers, I wrote up a variation to the steps. I have posted them here below... and who knows, if you make them, my explanations may be helpful. For the complete recipe, please see In Between Laundry. I did not want to re-print her work without permission!

Directions: Makes @ 100 patties, dependent on size
In a bowl, combine the potatoes, butter, peppermint, and powdered sugar and mix well (I used an electric beater). Add more sugar if your mixture is loose--it should feel like a tacky cookie dough. (I ended up using almost exactly 3 pounds.)

Lay wax paper down over a few cookie sheets (for easy cleanup later). Scoop teaspoonfuls of the dough and shape into patties. (The easiest way to do this is to scoop with an ice cream scoop or two spoons since it will be a little sticky. Once you have the whole cookie sheet covered, go back and pat them flat with your hands. The balls will lose their tackiness as you are scooping out the rest of the tray, making them easier to shape.) Refrigerate for a few hours so you can handle them to add the chocolate.

Melt the chocolates with the oil and dip the chilled patties, covering completely. This step takes some practice since the dough balls can melt with the hot chocolate. The best method I found was chocolate-ing the bottoms of each patty with a knife and going back once the sheet is done to cover the tops with chocolate. There are probably better methods out there, but I am a novice at baking. Chill until set.

Yum! Give it a try-- they are tooooo tasty!

Sunday, March 6, 2011

Beginner's Bias Tape Bag (by Prudent Baby)


I came across this super cute bag on Prudent Baby's website this week. Check it our for yourself-- I highly recommend it.

This pattern was amazingly amazing-- quick to work up and simple to understand. I also now feel like bias tape isn't as scary as I was feeling before. I made three of these bags this weekend. The tutorial shows how to make the smaller bag on the bottom that I have done in green and orange. It works up to be the size of a small handbag, using 2 fat quarters and 50 inches (or less) of bias tape. It fits my sunglasses, wallet, camera, phone, and chap stick easily. Jaime also recommends using a photocopier to enlarge the pattern to make a larger bag. I enlarged it to 200%. It took two yards of fabric and approximately 95 inches of bias tape.

After finishing the larger green-toned bag on the top, I ran out to the fabric store full of inspiration. I was invited to a baby shower for my good friend and her husband (also a good friend). I always have a secret giggle watching men struggling with carrying a diaper bag or holding their wives' purse. I was thinking it would be great to make a reversible bag for Kim and Jim-- pink for her and Superman for him. Kim is having a boy (her second) which means she is surrounded by super heros and blue all the time. The girl needs a good shot of pink in her life-- and I am just the pink-lover to give it to her.


 Here is how it came out! This is going to be my new go-to baby shower gift, I think. After all, it is the parents that are carrying the bag, not the kids. They should be something they want to have under their arm!

My one disappointment is that with it being reversible, I was unable to add any pockets. If I had more time, I would have made some organizers that they could use on the inside of either (so probably in neutrals like black or white). Regardless, they loved the bag and I was happy to give it to them!

Wednesday, March 2, 2011

The Linders Skirt

Here is the fruits of my labor the other weekend. I spent a good amount oftime refashioning sweaters and things and I made this skirt!

A co-worker had given me the cotton fabrics after he had discovered a bag of scraps in her basement. I think she said she made curtains a few years ago. Anyways, her nickname at work is Linderes-- thus the skirt name.

I have been rapidly loosing weight all year so I do not have clothing that fits me to use as a sizing template for the underskirt so I had to improvise. I took a pair of jeans I had been wearing this week and cut around the waist and hip areas. I eye-balled the basic length I was going for and figured I could hem it if it ended up too long. I cut out two pieces (a front and back) and added a little to the top for the elastic casing.

This project made me realize how much I need a serger, by the way. Those ruffles were a nightmare but I can't help myself- I love ruffles. So as a next step, I went about sewing my ruffles. After making piles and piles of them, I attached the ruffles starting from the bottom hem and working my way up. I originally was trying to go for straight even lines but abandoned that idea once I had three rows up and loved the variation when you made them wavy.

Anyway, take the ruffles up to as high as you want them to go. I made mine a little high I think. My hips are looking a little wide there. Anyways, once you have a height you like, sew in your elastic and volia, done!

Saturday, February 19, 2011

Refashion Weekend

This weekend, I have been spending my free time refashioning some of my too-big clothes. I made this little teaser graphic for you to enjoy. I will have pictures of the finished products, references to tutorials online if they are out there, and maybe a tutorial or two from me.

Let's see how it goes!

Monday, February 14, 2011

Pattern Review: Pieces of My Heart

I used Melissa Mall's Pieces of My Heart crochet pattern to make this pink and green pillow, modeled by my boyfriend, Ian. See, he even showed us that the pillow is fully-functioning!
 Thank you, sweetheart.

As far as patterns go, this one was quick and easy. The heart is made up of three parts, two half circles and a square, all seamed together. The sides are just straight lines of single crochet that you seam to the sides of the two hearts. You stuff the heart with Fiberfil, not a pillow form so it is up to you to make the pillow shaping work.

Love the Art Work, Hun!

 
I just wanted to give you a little peek of how the canvas I made for my sweetie looks on our bedroom wall. He came home and noticed it right away, bless his heart. I am an awkward present-giver so I went ahead and had it on the wall before he even came home. No unwrapping-- easy peasy. AND it gave me an excuse to hang up the mini canvases we made as presents for each other a few years ago. The idea was we made a canvas about ourselves and a canvas about each other.

Sunday, February 13, 2011

Valentine's Day Canvas Tutorial

A couple of notes for advice:
1. Use card stock if you are going to make your own stencils. That will help you avoid bleeding. Also, try to match the card stock near/close to the color you are painting with. The edges of my letters dried into the paint. I used sharp-edged tweezers to remove these little paper pieces but had I used white paper, this would not have been a noticeable issue.
2. I stippled my painting to avoid obsessing over perfect paint coverage. I made a nice mix of red, white, and pink which works well for the look I was going for.
3. I used my Gypsy to meld together the letters in the words that I made larger for emphasis. That made it alot easier to lay out the letters and make it work.

Monday, February 7, 2011

How I Spent my Winter Vacation

So, things were happening too fast and too furious during the Christmas season in December for me to be a very effective blogger. What that means now is I keep thinking about all of the cute projects and presents I gave away without a peep on the blog (or in some cases without even a photo snapped for prosperity).

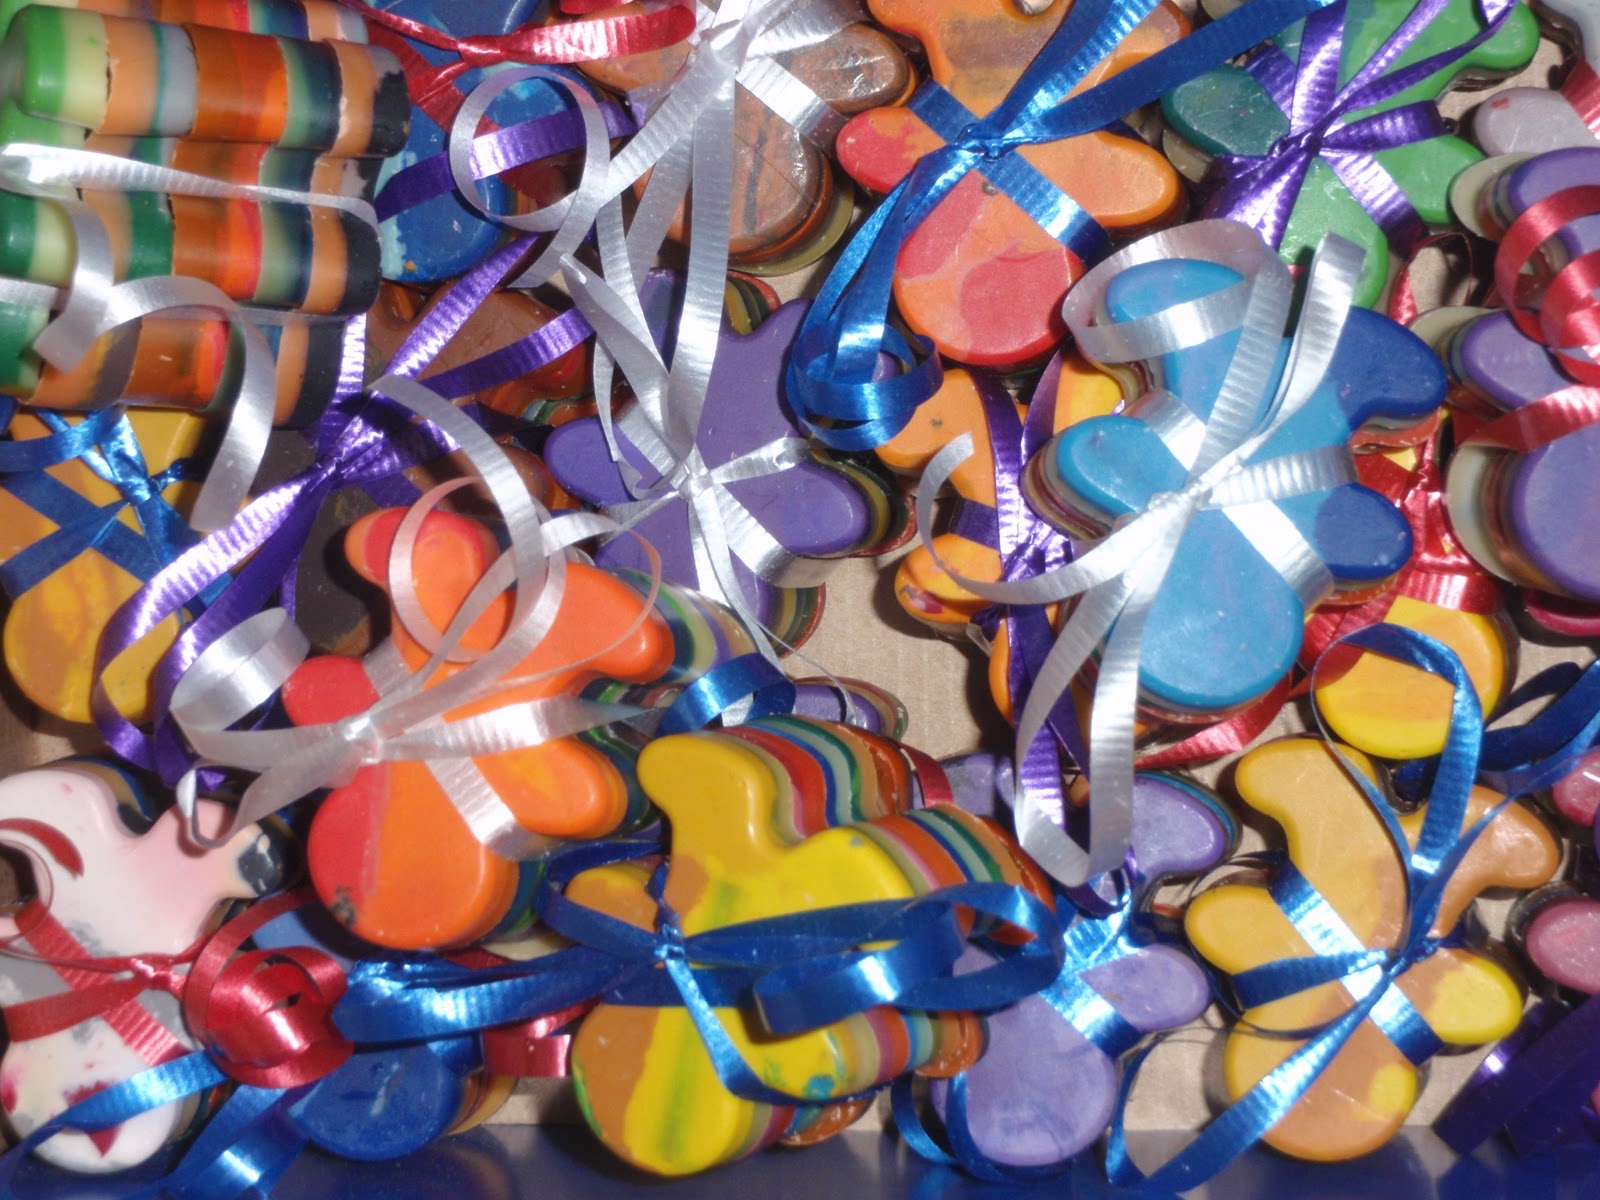
You see here, I crocheted the little tree using a Lion Brand pattern available on their site. I made the people-shaped crayons in the upper right using veggie spray, a silicon muffin tin, and broken crayons from the dollar store. Next down on the left, I made cute little wristlets for all the ladies in my life. The one shown there I made for my boyfriend's brother's girlfriend, Erin. She loved it, which was very rewarding.

Below that, I made 11 new stockings for all of the newer members of my family that didn't have one yet at my mom's house. It was great to have a stocking for everyone-- they turned out really cute AND I made it off the top of my head with no formal pattern. All the nephews, brother-in-laws, and girlfriends now have an important piece of Christmas at mom's. She has always made our stockings when we were children herself so I know it really meant alot to her to have the handmade holiday decor.

On the right in the middle is a gift card monster. I made a couple of these cute little guys to hold gift cards for my 3 nephews and a present for a co-worker. I thought that it would be a cute side present in addition to the gift cards. I'm not usually one for giving gift cards as a present but all of their mom's kept saying that they didn't need anything right away so... gift cards for when they do!

Moving to the bottom row on the left, I made a viking hat for Lucas (my youngest nephew) using crochet again. I made it from my own head without a pattern-- it still needs some work. It turned out a little short for his skull. It can be really hard to make something for someone when you don't have accurate measurements!  I wanted to surprise his mama and daddy so I didn't want to obviously size him while I was working on the hat. This is the result of that (lol). Oh well, imperfect makes it homemade!

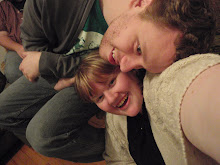
And finally, the bottom right picture is of my boyfriend, Ian, in a Charlie Brown scarf. To my disappointment, I have not seen him wearing it outside of our house, but that isn't too suprising. He isn't really a scarf-wearer. So why did I make it then? The idea just came to me suddenly-- He loves Charlie Brown and while looking at a chevron pattern for a blanket, I thought of how great this scarf would look. I love it, anyway, and that is what is important. I also sewed him slippers with Charlie Brown fleece to wear around the house. They turned out cute. He wears those much more than the scarf so win on that front.

And there you have it, a few more of the projects I worked on. There are still a number of other projects I tackled in December that I haven't shared. Maybe I'll get around to it soon :-)

Friday, February 4, 2011

As Promised-- Photos!

I *finally* got the camera situation under control! Also, I bought Photoshop!! I used to have it back in college but that was many versions ago. Ian bought me a laptop for Christmas so I have a new machine and new new Photoshop.

As promised, here are the pictures from the two purses I made as presents last week.


As I had mentioned before, I used the Buttercup purse pattern by Rae. The black, white, and grey purse with the sunken zipper was made for my boyfriend's mother (as a Pollyanna Christmas present). I gave it to her at Christmas part 4 this past Sunday. She loved it and so did our cousins and aunt. I see some more purse-making in my future.

The orange lined glitter-fest I made for my friend Sam. She was super-great to me two weekends ago when I really needed a friend and she totally deserves a surprise. I hope she likes it.

Thursday, January 27, 2011

Camera Woes

After all of the crazy craft rush towards Christmas,  I took a few weeks off from creating.

This week I am back in the saddle again! I made two cute purses using the Buttercup Bag pattern that I found online (for free!)

My camera is being stupid so I cannot post pictures yet-- but I will.
I will, however, describe them here.

The first bag is made with a nylon sequin fabric in teal and black-- sparkly and so cute! The bag has a bright orange lining and a magnetic closure. I made that bag for my friend Sam. This weekend past she really took care of me and I wanted to make something for her to show how much I appreciated it.

The second bag I made with black, white, and grey dotted fabrics (3 different patterns). I used a sunken zipper modification on the pattern and sewed the handle into the top seam between the lining and the exterior. This bag I made for my boyfriend's mom. It is her Christmas Pollyanna gift. In his family, Christmas happens 3 times a year with different sections of the family. This Sunday is the 3rd Christmas this season at his grandmother's in Maryland. I hope she likes it. His mom isn't really frivolous (like me) so it was really hard to figure out what to make/get her.

Pictures pending, I promise.

Thursday, January 13, 2011

SAVE 2011

Time for my annual S.A.V.E. scrapbook retreat.

Don't miss me too much while I am gone. I'll be back and posting on Monday!

Monday, January 3, 2011

Pay It Forward!

The Fabric Addict started the New Year out with a fantastic idea incorporating the Pay It Forward mentality. I am hoping to take part in this over the next couple of months! Leave a comment here and blog about this awesome idea, too.

"Pay It Forward" is the idea that random acts of kindness are given without expecting anything in return. It's passing on a kindness hoping that your recipients will do the same, forming a never-ending chain of goodwill-- that's what this is all about. As a bonus, this is also a great way to connect with our fellow crafters, to network,  and to share our enjoyment of crafting instead of just keeping it to ourselves or where only friends and family get to see it.
Here is how Pay It Forward works in Blogland: Make a comment on this post. The first three people who comment will receive a handmade gift from me within the next few months! I will be contacting you for your mailing address so please make sure you post that in your comment too or make sure your blogger profile has your email address listed. The first three people that comment will post this same idea on their own blogs and commit to making a gift for the first three people who comment on their post and so on and so forth.
So, in short, the first three people to comment here will get something handmade by me (providing they also make a Pay it Forward post on their own blog).  I'll be reading your blog to figure out what to make you and to make sure that you have posted about your Pay it Forward!


Tutorial: Button Monogram Art


I apologize it has taken quite so long to get this tutorial posted! As I know I have mentioned a time or two—it has been a busy couple on months.
Anyway, here goes!
 

Tutorial: Button Monogram Art 
 
Materials:
Canvas or frame
Piece of scrap fabric
50-200 buttons of the same color (give or take, considering your project size and the size of your buttons)
Needle and Thread to match the button color
Staple gun with staples
Initial template (hand drawn or printed from a computer)
Embrodery hoop
Straight pins


1.       1. First figure out what size frame or canvas you are trying to cover. Add an inch all around to allow for overlap and attaching at the end.

2.       2. Once you have your size figured out, sketch up the initial you want to recreate. You can freehand a template or print out a font on the computer.

3.       3. To actually start working, take your piece of fabric and stretch it out over an embroidery hoop.

4.       4. Pin your monogram onto the center of your stretched fabric.

5.       5. Now, bust out your button collection! There was two ways to go about laying out your buttons to the monogram. Way one: take out your button collection and lay out all of your buttons over a second paper copy of the initial template to see where and how to affix your embellishments. I did this with my first uppercase letter.  It worked out well—I took a digital photo of the layout before moving any buttons so as to preserve my hard work. Way two: wing it! That is the approach that I took for the lowercase letter.

6.       6. Starting with larger sized buttons, take a needle and thread and attach buttons thru the initial template. Don’t worry; you can cut the paper away later. 

7.       7. Once you have your main, base buttons attached, cut away the paper. If you wait to do this later on after the small buttons are sewn are, it is much harder to remove the paper cleanly. (You can wait, though if you want. I did for the first monogram!)

8.       8. If you did decide to keep the paper on thru to the small size buttons, take small scissors and start clipping away the paper that you are able to reach. To make it easier, remove the fabric from the hoop. Please be CAREFUL not to cut any threads you have in and around the paper.  

9.       9. Remove your fabric from the hoop (if you haven’t already). Lay the piece face down on a counter. If you used buttons with back loop shanks, you may want to lay the piece down on a slightly padded surface. Lay your canvas or frame over top your fabric, centered. Take your fabric at the top and fold it over the back of the frame. Place one staple in the top center. Fold the bottom of the fabric over the back. Pull taught and place a staple in the bottom center of the fabric. Repeat steps for the left and right side of the canvas.  Starting at the top again, pull your fabric taught along the edge, placing a few staples along the way. 

10.   10. If there is any extra bulk fabric on the back, trim around the staples so the back of the artwork can lay flat against the wall.

11.   11. Hang up—and done!

Sunday, January 2, 2011

A Christmas Plushie (Results!)

Remember how I was making a mini-dad for Christmas?
Well, what do you think? I think it turned out pretty cute. This is my first ever plushie and I think I learned some things about construction while creating it.

It is important to think about how you are going to seam the whole figure together BEFORE actually constructing any of the pieces. I also spent a good deal of time logic-ing out the front and back designs-- the template I created was for only the front of the figure.

Well, anyway. What do you think?

Saturday, January 1, 2011

Congratulations, Caitlin and James!

Last night was my sister Caitlin's wedding. It was great fun-- I did a lot of special projects for her special day that have been taking me away from posting new items on the blog.


Now with it done and Christmas over, I will have more time to devote to the site! More later on all of my crafty presents I gave and received in 2010.


Happy New Year, friends!

Monday, December 20, 2010

The Annabelle Apron

Our corporate office has a Christmas party every year with a theme. Last year, we had a Wild West Christmas, complete with a mechanical bull. This year, it was the Food Network. To go with the theme, we had an apron contest. Contestants were to create or decorate an apron and model it (and your story if you have one) at the party.

I have never made an apron before, but I thought that I would take a stab at it (while still making too many crafts as Christmas gifts:-) ) I went looking for a cute pattern online that would show off my new svelte figure. I am officially down 141 pounds-- check me out!

This is the Annabelle Apron by Hoffman Fabrics. I fell in love with the picture posted with the pattern so I thought I would take a stab at it. The pattern was really easy to follow-- and I LOVE the results.

I won 3rd place and a $50.00 American Express gift card. Not too bad... and even better, I felt very pretty. The pink, love, black and white are right up my alley. Add a tiara everything would be perfect!

Saturday, December 11, 2010

A Christmas Plushie

So, Christmas gifts for my father can sometimes be difficult. Not that he is difficult but he never lets on to what he wants or needs. Usually, I get him some dress shirts for work, maybe a superman t-shirt, and a gift card to Home Depot. There is ALWAYS something to fix at my parents house, it seems, and dad gets a thrill out of fixing things for free (well, free for him anyways).
I was in Home Depot looking at light bulbs and happened across a cute little apron gift card holder. Perfect! So for Christmas, I am looking  make a mini Dad and put the apron with his gift card on the plushie. It is my first plushie so I started off drawing out a cartoon likeness of him.(That's Dad with my nephew Dylan.)

What do you think? Not bad!

I'll keep you posted on how it works out.I am hoping for good things-- this is my most brilliant Christmas present idea yet this year!


Wednesday, December 8, 2010

My First Special Order

As you know, we had a craft fair last week to benefit a family in need this holiday season. I made a ton of crafts for the even. Really, I wanted it to be successful and I had no idea what would and would not sell at something like this. I attend craft fairs sometimes but I guess I never pay attention to what interests people-- I mainly go to ooh and ahh and pick up a few treats.

One thing I found is that people largely viewed my little crochet dolls as pet toys (lol). I sold quite a few to people that were saying their dog or cat would be excited. I hadn't thought of that and wished I had made a few more with animal safety in mind (not using small parts, etc.)

A woman that I normally only smile at in the hallway asked me to make a special treat for her puppy. He was going in for surgery this past monday and she thought he would love a set of my bunnies, in blue and without the small details. I went home and whipped them up post haste-- and here you see them before you. My first special order from a paying customer!

I wish I had been able to be more elaborate with them but I aim to please so simple the are.

I hope the puppy likes them and gets well soon! Sick animals make me so sad.

Monday, December 6, 2010

Halloween Block Swap

I never told you how it went!

This past Halloween, I participated in my first every quilt block swap. It was a ton of fun!!

I really enjoyed picking out my fabrics, making the blocks, and the wild variety of the other 11 members of the swap. There was a terrific variety of theme, skills used, fabrics, and craftmanship. One of the things that really impressed me is that the fabrics all really fit together so well.

I think I will frame each square in purple to make my quilt? We'll have to see. I will definitely get it completed by next October (even if I am quilting it over the summer!)...

I have nothing but positive things to say about the swap organized by Aunt Pitty Pat. Really well done-- and they should be. She seems to host them all the time! Practice makes perfect, my friend.

If you are looking for a sewing or quilting swap, go check out her blog. Some good stuff out there!

Friday, December 3, 2010

Oh, What a Relief It Is

So you may be wondering "Where has Shanny been all month!?" I have been crafting, my friends! Alot has taken place since I was last able to write. In short (and I will post more about my adventures at length over the next couple weeks), I was working on my sister's bridal shower, bachelorette party, craft sale for our Adopt-A-Family project at work, a few special orders (!!!), making a playing card game, sewing Halloween costumes, a tote swap, a Halloween quilt square swap, a Christmas ornament swap, a Christmas present swap, baby shower presents... and helping prepare for my sister's New Year's Eve wedding.


To start, here I am setting up for one of our craft sale days in the office. It was alot of fun but WAY too much work, I must say. It is really hard to keep a group of 50+ people engaged and interested in participating in something. I made a bunch of the crafts seen here so that has been taking up much of my time. We did pretty well -- $458.00 from 3 days of sales. The proceeds go towards buying Christmas presents for a family from inside our company that is in need.